



Starcraft
Includes the Brood War expansion pack.
| 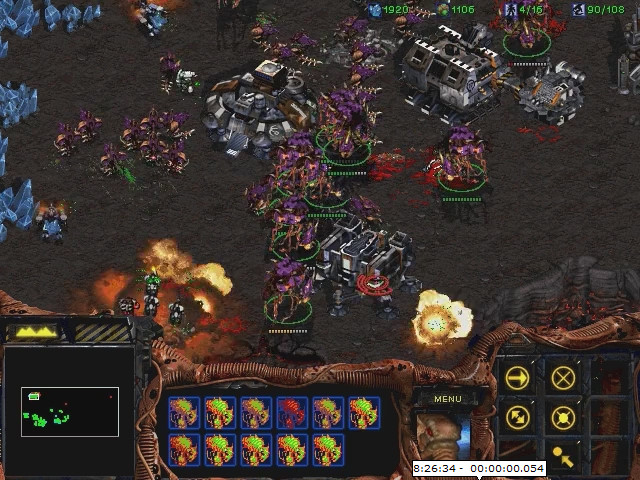
Screenshot |

 Download Part: 1

Player's Review
Hi, my name is Jaded (or JadedZerg) and this my first longplay. Starcraft is a RTS game that was published in 1998. It took off in Korea to such an extent that they have had professional teams/leagues broadcast on Korean TV since 2000. It is no longer broadcast on TV (Blizzard forced them to broadcast SC2 instead) but there is a large amateur league that still goes on. Starcraft is my favorite game of all time and I still play it online (on ICCUP/Fish Servers). In addition to the playthrough Im going to write a little guide here on my thoughts for each mission the strats I use, or explainations of things I did in the game. I do try to show on screen the different effects of abilities and micro techniques so you dont have to read this to understand whats going on. With that lets jump in.
I wanted to note that my camera will jump around the screen occasionally seemingly without me doing anything. I am making use of the screen hotkeys done by pressing Shift+F2,3, or 4. This will save a screen location and you can recall it by pressing f2,3, or 4. Also other than the mission names there wont be any story related spoilers in this.
Terran Mission - Tutorial: This tutorial is meant to get you somewhat familiar with the controls and a few of the units and how to use them. While I am very familiar with the controls/units I feel anyone who didnt know could benefit from this. Not much else can be said that isnt already shown on screen. I did however fail pretty hard in that I didnt build 3 supply depots before the vespene geyser. I was confused as to why it wasnt advancing after I got 100 gas.
Terran Mission 01 - Wasteland : Another tutorial like mission. It gets you used to making marines and hero units (Raynor). Since there would be a lot of dead time while I build my 10 marines I decided to display vulture Micro. I attempt to show it in the video without words but what you do is movie the vulture away from the unit you want to attack and then use a patrol command (P) past the unit. The vulture will look like it fires backwards. after which you click away from the unit again and repeat the process.
Terran Mission 02 - Backwater Station: Fairly simple mission I cleared most of the map with Raynor but Raynors attack does not do so well against buildings and Hydralisks can shoot back at him so I used some marines/firebats to finish off the buildings. It should also be noted that Firebats do splash damage in a straight line in front of them.
Terran Mission 03 - Desperate Alliance: This mission involves waiting in base for 30 mins until backup comes. So in an attempt to make it more interesting I move out and clear the map This also introduces you to weapon and armor upgrades (the infantry upgrades are at the engineering bay) each upgrade will increase your damage or armor for all units.
Terran Mission 04 - The Jacobs Installation: There are a few missions like this where you are given a set of units and given an objective. There really isnt anything new to explain here that cant be seen in the video.
Terran Mission 05- Revolution: This mission involves an island map and introduces you to flying units. Most notably I use Wraith micro in this mission. Simply put if you have all the flying units in a control group fairly close together they will stack. I use this stack to hit and run on enemy units. You could also do this mission by making dropships and ferrying marines over. I just thought wraiths were more fun.
Terran Mission 06 - Norad II : I dont really do anything new here. I just make an army of Marine/Firebat and clear the map.
Terran Mission 07- The Trump Card : In this mission I finally get siege tanks. With the siege tanks I can finally go mech or Mechanical units (a combonation of vultures/goliaths/tanks). Mech is a very Gas intensive strategy so I need to secure another gas ASAP. I use missile turrets and tanks to secure the 2nd gas. From there I build more tanks and goliaths and leap frog to the objective. Going mech is the standard strategy to do in TvT (Terran vs Terran) as marines get obliterated by tanks.
Terran Mission 08- The Big Push: Since it is TvT again I use the same strategy and slowly push my way up to get a 2nd gas and build up more units then proceed to clear the map.
Terran Mission 09- New Gettysburg: In this mission you are up against protoss. Much like Terran vs Terran Mech is the standard way to play against protoss. However in this case I only have access to 1 gas and the map is very cramped. It would be hard to maneuver around the map with a mech army so I decide to just go bio (Infantry). I have trouble at the start but after the first few waves of Marine/Firebat Im able to kill the Tosss upper right base and finish his lower right after that.
Terran Mission 10 - The Hammer Falls: The last Terran mission. I decide to have some fun and go mass wraiths again ^^. Its probably not the best way to complete the mission but I enjoy air unit micro.
Zerg Mission 01 - Among the Ruins: Ah finally the best race of the 3. We are introduced to my beloved Overmind as well as the basic units. Since there isnt really much I can build other than Lings and Hydras I use those 2 to finish off the terran base.
Zerg Mission 02- Egression: This mission adds a few units but unfortunatly it is not practical to use them. Mutalisks(the flying unit) cost 100minerals/100gas your really need at least 2 gases to be able to produce them. Since I only have access to 1 gas I am forced to go hydralisks(which are much less gas intensive at 75min/25 gas). You also aquire some hero units in the form of hunter killers. These are hydralisks with increased health/armor/damage. I show the differences in the video. From here it is simply clearing a path to the beacon.
Zerg Mission 03- The New Dominion: In this mission I only start out with 1 gas, but there is another gas close by. Since the Terran has siege tanks and I dont yet have the units to properly deal with them yet this is a perfect time to go mutalisks. I only need 2 hatcheries and not very many drone to do this. The way I micro mutalisks is roughly the same as when I micro wraiths. I use an overlord instead of a trapped SCV as the unit thats far away from the rest. Mutalisks also have a shorter range than wraiths but their attack does bounce doing 9(first hit) 3 and then 1. Using hit and run micro with the mutalisks I take down missile turrets and reduce the marine count. Eventually I just run over him.
Zerg Mission 04 - Agent of the Swarm: In this mission you are isolated on an island with the objective of killing a command center. You get a glimpse of the base and there are a lot of missle turrets there. You are also limited to 1 gas at the start. There is another island with a gas on it but I didnt feel like it was worth taking. I decide instead to go for a hydralisk drop. I upgrade overlord speed and ventral sacs which lets me put units into the overlord then drop them. To load the Hydras I select them then shift click on the overlords. Shift clicking tells a unit to go to the first place you clicked and then to the second place you click. This means once an overlord is full of units they will attempt to go to the next one and so on. Now for the dropping technique I spread out the overlords so I can click on each one clearly and easily. Then I tell them to unload past where I actually want to unload them. As they are flying I select each one and press the unload button (U) and click on the overlord. This causes the overlord to begin dropping the units inside while moving toward its destination. I repeat this with as many overlords as I can before they reach their destination. I take out the terrans base and infest the command center. Normally I would be able to build Infested terrans from the command center (100min 50 gas) which run quickly and suicide for 500 damage. The mission ends right after so I dont get to.
Zerg Mission 05- The Amerigo: This is another one of those missions like The Jacobs Installation. You have to take Kerrigan through the map to the beacon. Not much of anything new here.
Zerg Mission 06- The Dark Templar: This mission gives you a new unit, guardians. They are long range air units that are upgraded from mutalisks. You can upgrade the mutalisks after you have a greater spire. In this mission I did not use them as I feel they are very slow and not as fast paced as ling/hydra is. From the starting position there are 2 bases on islands. The first thing I want to do is upgrade drop and take those 2 bases ASAP. From there I can mass up hatcheries and go ling/hydra to run the protoss over. Ling hydra is a very mineral and larvae intensive strategy so I needed to make many hatcheries to be able to keep my money low (Still had 1k+ at the end of the mission though)
Zerg Mission 07- The Culling :This is the first ZvZ (Zerg vs Zerg) mission. In this mission I know that the main zerg base is located on an island so I decide to go muta/ling. I quickly take the base to the left and then clear out another in the upper right. From there its just massing mutas and running him over.
Zerg Mission 08- Eye for an Eye: This is an interesting mission. If any dark templar touch one of the 3 beacons on the corners of the map, you fail the mission. This mission also introduces nydus worms. You can build them once you have a hive and they cost 150 minerals to place. After they are built you may select the nydus worm and it will let you build an exit anywhere else on the map where there is creep. Once finished any units right clicked on it will warp back and forth. Since Dark Templars are invisible and overlords are detectors you must also have 1 overlord by each beacon to see the Templars. Your objective is to kill the 2 protoss bases. My objective is to go Ling/Ultralisk/Defiler (Defilers for darkswarm). Dark Swarm prevents any ranged damage from hitting any unit inside the swarm. The applies for my units and enemy units. However splash damage will still affect units. A Reaver shot will work, the Archons main hit will not work but the splash damage will, and the main hit from a tank will not work but the splash damage from it will as well. I demonstrate its use in the video. To get that composition however I need at least 3 gas so I take the two bases near the other two nydus canals. After Ive built up enough I move in for the kill.
Zerg Mission-09-The invasion of Aiur: This mission involves getting a drone to a beacon in the lower center of the map and then holding it for awhile. I know that I am limited to about 2 gas so I decide to just make hydralisks. Hydras are the bane of all protoss. The only way to take care of them is to use AoE(Reavers or Psionic Storm). psionic storm is the better of the 2 options but the AI never has enough templar and isnt able to place them correctly to prevent me from dodging them. it is a fairly straight forward mission, make hydras, kill things.
Zerg Mission 10 - Full Circle: This is the final mission for zerg. If you are not aware of the meaning of "Zerging" something my play in this mission should make it clearer. The beginning starts normally I kill off a creep colony so I may place my hatchery. From here I am looking to expand and since I know I have 3 or more gases available to me my intention is to go Zergling Ultra defiler. Since i only have one gas I start off with hydras with the intention of taking the bases to my left and right. My attack on the left base went well, so I thought. I was a little too greedy and tried to make too many drones before actually securing the bottom left base. I end up losing control of that base and make more hydras and send them over in an attempt to secure it. Then 3 scouts and a carrier. Out of nowhere they came from the right side and I had nnothing to defend with as I had used all my hydras on the left base. I was in a lot of trouble but I separated the scouts from the carriers and killed them off. From there I built more hydras and killed the carrier and regain control. My plan remains the same but I carry it out a little more carefully this time. After taking the left base I add on more hatcheries and then go for the right side. At this time I realized that although I had 3 gases the gas to mineral ratio was not so great. I decided to continue the Ling/Ultra/Defiler plan, but without the Ultras and Defilers. I then proceed to zerg the protoss temple. The weak and feeble protoss stood no chance against the might of the swarm.
Protoss Mission 01-First Strike: Unfortunatly all good things must come to an end and starcraft saved the worst for last. Its time to begin the protoss campaign. Since the protoss are so weak I wasnt sure I would actually be able to finish this campaign but I figured with my superior zerg intellegence I would be able to pull these inferior warriors through. Much like the last 2 campaigns this one starts out with a basic tutorial on how the workers and the buildings work for protoss. I upgrade +1 weapons for my zealots which is very important vs zerg. If a zergling has 0 armor and a zealot has +1 weapon the zergling will die in 2 attack animations from the zealot. If they have even upgrades it will take 3 hits from the zealot. Had I not been controlling them the protoss would never have been smart enough to figure this out and would have fallen to the swarm.
ALSO fun fact: If Judicator Aldaris sounds a little familiar that is Paul Eiding AKA the Colonel from Metal Gear Solid.
Protoss Mission 02-Into the Flames: Also a pretty simple mission. I start out fine just making units and attacking the glorious zerg base. Then Fenix comes in and since he has no idea what to do on his own I have to tell him where the cerebrate is and to attack it. Things are going well until finally Fenixs frail and useless body falls to STATIONARY defense structure. Congratulations Fenix you died to a unit that doesnt even move. Thats like running into a parked car on foot and dieing, good job. Even though I think the outcome was wonderful the game does not agree with me. I have to do it again but this time I know better. Since Fenix is completely useless I decide that this time Ill leave him up on the high ground. But since hes also an idiot and might run off and trip over a rock and die I decide to block the ramp as well just to make sure. Fortunately Fenix did not jump off the cliff and die so I was able to compete this mission.
Protoss Mission 03-Higher Ground: The foolish protoss have finally realized that they cannot hope to harm the zerg. But since there dumb as bricks they are going to try anyways. This mission was a little bit of a fail. I wanted to go mass scouts and micro them much like wraiths and mutas. However you should know scouts are the worst units in the game. They cost 275 minerals and 125 gas and 3 supply and do almost nothing to ground units. Their only Strength is that they can be microd like wraiths and Mutalisks. After the first few attack attempts on the zerg base it becomes apparent that they are actually so bad that I'm not going to be able to make it work. So instead I make an army of zealot/dragoon and clear the map. Fortunately the Cerebrates were playing poker in the zerg briefing room otherwise I would have died.
Protoss Mission 04- The Hunt for Tassadar :Well lookie here captain useless gets himself killed by ONE hydralisk. Just ONE. Good job. At any rate since we beat the two AFK cerebrates we get told by the Colonel to go find Tassadar, who might be the only USEFUL protoss out of the whole bunch. You start out with a few units and must get through a gauntlet of clever zerg units. Fortunately we completely outnumber them otherwise we would have died. After we find Tassadar I get a nice idea. I think to myself "I bet I can do this with just Raynor& Then I run into hydralisks & Okay I bet I can do it with only Raynor and Tassadar" Then I run out of storms, "Okay I bet I can do this with only Raynor Tassadar and 2 Templar for storms and them merge them for 1 archon"...then I run into more zerg. "Okay I bet I can do this with just Raynor Tassadar an Archon and some dragoons" Then the dragoons die. okay I bet I can do this with ju-ah screw it" Eventually I get through though.
Protoss Mission 05-Choosing Sides: The Colonel is not pleased. Sadly we dont get the option to side with him which I might have done since he is The Colonel after all. Getting on to the actual mission though it is a bit lame. You have to maneuver a shuttle through Zerg airspace to get to the beacon. Instead of killing everything I decide to make a lot of shuttles and a few templar then make a bunch of hallucinated shuttles and pray that Tassadars shuttle does not die. Fortunatly it doesn't and this one is over fairly quick.
Protoss Mission 06- Into The Darkness ear god I still remember this one from my childhood. Specifically because I died so many times on it. Killing the units isn't so tough it's the burrowed infested Terrans that are the problem. The way you deal with them is to hallucinate a zealot and run it in to an infested Terran. It will blow up killing itself and your hallucination. But you really need to know where they are located otherwise they will surprise you. Fortunatly I remembered that the burrowed ones are only set off by marines so I was able to bait them out. If you actually know where most of them are the mission isnt too difficult.
Protoss Mission 07- Homeland :Great, Captain Failboat is back, just who I wanted to see. Now Colonel is REALLY REALLY upset with us so its time to take him on. This mission I expand quickly and build up an army big enough to take out the bottom left base. From there I pushed onward toward the bottom right. I used Zealot/Dragoon/Templar for this one. You should have either high templar or reavers with your army as you always want at least some AoE.
Protoss Mission 08- The Trial of Tassadar :This mission kinda sucks. Because of the way the map is shaped its hard to assault the base from the ground which leaves the air. Which means carriers So I built up a ground army and took both of the bases on my side of the river and got a control group of carriers. A little micro later and the mission was done.
Protoss Mission 09-Shadow Hunters: In this mission you must kill two cerebrates with Zeratul. Now that the Zealot/Archon composition is open to me, AND I start with 2 gas I gladly take the opportunity to use this comp. After finishing upgrades it wasnt too hard to defeat the Cerebrates (Probably playing poker again).
Protoss Mission 10 - Eye of the Storm: In this mission you get to control both Protoss and Terran units. Again I did a bit of a fail in trying to use bio against the zerg. The AI has burrowed Defilers which cast plague on your units when they get too close. After a few waves of Bio I realized this wasnt going to work and that I would need to go zealot archon. I did however have some vessels which would be useful with archons. I also managed to find 4 gas geysers in the top right which enabled me to make almost all archons. I finish the mission off with D-Matrix(Absorbs 250 damage) on Archons.
While the ending isnt exactly to my liking it doesn't bother me too much. The Swarm Never Dies.
Thank you for reading/watching or just watching.
-------------------------------------------------------------------------------
Hey, its JadedZerg again and this time Ill be doing Starcraft Broodwar. This is the expansion to the origional Starcraft and I hope you enjoy this playthrough. Much like last time Ill be explaining anything new as well as my thought process (If I have one). Let jump in.
Protoss Mission 01- Escape From Aiur: Well they decided to have you play the worst race first which is fine with me. The sooner it is out of the way the better . This mission inolves you taking Zeratul along with a small squad of units and navigating your way through a map to reach a warpgate to escape. Unlike the SC1 intro missions the BW intro missions assume you know what youre doing and throw you right into the action. After the first few sections you get to a point where you are given a large amount of zealots that are already fighting zerg. Here I select portions of the group move it back a little and tell it to re-engage. Im trying to give myself a slightly wider arc so that more zealots will fit into it and give me a better exchange. Near the midpoint you are given an archon, 2 templars, zealots, and dragoons. I immediately make the two templars turn into an archon because templars are way to slow and there really arent enough zerg units left on the map to justify using storms. I continue on and reach the warpgate. A little vulture micro rounds out this mission.
Protoss Mission 02- Dunes of Shakuras: Another intro mission that contains "new" units. I say "new" because weve seen dark templar before. However, in this game you can now make them for 125minerals/125gas. Sadly we dont start out with a nexus so theres a little dead time while I build one and 2 pylons. Feel free to skip to 17:05. At this point we are given 4 dark templar. While I am making probes and getting some gateways up I grab these 4 DTs. There are some Sunken Colonies around the map that I am going to kill. Since DTs are invisible they cannot be seen unless an overlord is nearby. Once an invisible unit attacks a building the AI is programmed to send an overlord to that location. so I surround a sunken kill it then back off. After the overlord leaves I am free to return. There is another base I could take in the lower left but there isnt really a need to, the base you start with is more than enough to get the units needed to destroy the zerg base. From here I wait for zealot speed upgrade and proceed to destroy the zerg base.
Protoss Mission 03 - Legacy of the XelNaga: Then it is clear that we must retireve these crystals where ever they may be-Artanis. From henceforth Artanis will be known as Praetor Noh'Sheet. At any rate this mission mainly serves to introduce you to an actual new unit the Corsair. They are an air to air fighter and while they dont do a lot of damage on their own their attacks do splash damage to units nearby. This makes them ideal for taking on a flock of mutalisks. Their other ability, which is displayed at the beginning, is Disruption web. It is cast on the ground and anything inside the circle may not attack at all, including Melee Units. The AI shows us that it is effective at disabling Spores and Sunkens. This is important as your objective is to get on an island base and take out 2 cerebrates (Probably STILL playing poker) located on an island. You do not have to use disruption web to get onto the island but it helps. Sadly, most of this mission is me building/upgrading an army to drop onto his main base. After I take the other base I simply get enough shuttles and drop zealot/archon onto the island.
Protoss Mission 04 - The Quest for Uraj: Thanks to Praetor Nohs brilliance we now all know what we have to do. This mission begins with you taking out a terran base. After this is done I establish my own. In this mission there are two ways you can go about reaching the objective. The first way is to use the path directly to the south. This is a frontal attack route. There is another route that starts at the back of your base. I opt for the 2nd route as it is much quicker but it does involve using shuttles.
Protoss Mission 05- The Battle of Braxis: This is another Mission in which your objective is to kill all the generators. After you kill each generator you are given more units. At the first one I get my dragoons up on the high ground to attack the bunkers. Units on the lowground have a 47% chance to miss their attacks on units on the high ground so after the units in the bunker are attacking the dragoons I move the zealots in for the kill. The second generator is more annoying since trying to move dragoons around in small passageways is very frustrating. At the end though I get everything positioned correctly and bumrush it. The path to the next generator is protected by siege tanks so I use scouts to take them out then send my ground forces in to get rid of the generator. The next sections generator is on a fortified island which is surrounded by 4 ghosts and spider mines using the dragoons and observer I clear out the spider mines and use my templars to storm on top of the ghosts. I manage to get lucky and a tank comes to the edge to check out whats going on so I get a free kill. After I take the 2 missile turrets down I decide I can drop DTs and take out the generator. The last generator takes a little while to setup but once I do, it ends gloriously.
Protoss Mission 06-Return to Char: As stated in the briefing, there are two ways to complete this mission. However, since I am limited to 2 gas but have a buttload of minerals I decide to go Zealot/Archon and overrun the overmind. The protoss base is also slightly closer to the overmind so less walking that way. We also get our first glimpse of lurkers(the things at the top of the ramp). They are zerg units that may only attack while burrowed and send spikes up towards their target. Each spike also does splash damage where it comes up from the ground. After breaking through the first base I Zealot/Archon my way to the overmind and incapacitate him.
Protoss Mission 07- The Insurgent: We return home to find that The Colonels jimmies have been rustled a bit too hard and now we have to deal with him. When we get into the mission we see that there are 3 Colonels. 2 are fake 1 is real. There are a few ways to do this mission. The easiest way to do it is to turtle till you have 12 carriers and then run him over. Instead I decide to go for a large ground army with Dark Archons to mind control anything important. I take 2 expansions early on and rely on my Dark Templar/Archon to defend it. I get surprised a little early on and almost lose my 3rd expansion because of it. After I defend that attack and get my gates up and producing, I begin the assault. Sadly, this mission does not have a happy ending. I would have much rather disposed of Praetor Noh instead.
Protoss Mission 08- Countdown: The last protoss mission, and it comes in two parts. The first part is getting Zeratul and Noh to the temple and the second part is defending that temple from the zerg for 15 mins. My plan is to get upgrades and a decent sized army. Then to go and take the middle of the map but not bring Zeratul/Noh. Ill then establish a base around the temple and use Zealot/Cannon/Corsair to defend. Zealots will take care of anything on the ground (AI doesn't use lurkers in large enough numbers to stop my zealots) Corsairs will take care of everything in the air, and the cannons will stall until my Zealots or Corsairs can get there. Everything pretty much goes according to plan so after a lot of building up/waiting/defending the protoss campaign is complete.
Terran Mission 01- First Strike: In this first terran mission we start off with no gas at our first base and only 1 other gas on the map. With access to only 1 gas I decide the best thing to do in this case is build up a force of marine/tank and push into the command center. Its also a bit easier to maneuver marine/tank through the path in the back than vulture/tank.
Terran Mission 02- The Dylarian Shipyards: This is a baseless mission and mostly serves to introduce you to one of your new units, the medic. Unfortunately the abilities you learn to use with the medic dont really apply in practical situations and are only useful rarely. While I use blind to render the tanks useless if there was even one other enemy unit nearby it could for the tank and the tank would still be able to fire. The Restoration spell is alright but youll rarely use it since its only good to use on high priority targets(Tanks/Vessels). The example they give us is removing lockdown. But in TvT I'd rather have 1 more tank than a medic and restoration. Throughout this mission youll see me selecting all 5 pilots clicking on one beacon then deselecting one pilot and clicking on another beacon and so on until theyve all been given orders. This is a process known as (Clone - ing) and I use it in a more practical situation in the last part of the mission. Once I've gotten all my battle cruisers I leave a few out in front to spot. Once the enemies cruisers come into view I select all my battle cruisers and tell them to use Yamoto Cannon on one of the enemy cruisers. Then I deselect 2 of them and tell the rest to use Yamoto on a different cruiser. If I had just let the 12 battlecruisers use Yamoto cannon on one battle cruiser they would have all fired and I would have wasted a lot of damage. This way I spread the damage out and give myself a large advantage in the fight.
Terran Mission 03- Ruins of Tarsonis: In this mission I use the standard Marine Medic to kill everything on the map. It also includes the use of dropships to finish off the last zerg base.
Terran Mission 04- Assault on Korhal: In this mission we are given a choice. Either take out the physics labs or the nuclear silos. As the briefing states whichever one you take out will result in the enemy not being able to use either battle cruisers or nukes in the next mission. As much as I enjoy a good game of "Find-The-Little-Red-Dot-in-5-seconds-or-lose-everything" I decide Id rather deal with battlecruisers next mission. The strategy is simple for this one, I want to secure 2 gas and then get a mix of tanks/goliaths and push into the silos. There is another base you can take to the south west but you really only need 2 gas for this. If you do love to play "FTLRDI5SOLE" you may do the same thing but instead destroy the labs to the north east.
Terran Mission 05- The Hammer Falls(Birds of War): As stated in the previous mission had you decided to go for the labs you would be facing nukes instead. As such in the beginning your 3 outposts would have been destroyed by nukes instead of battle cruisers. Since this base is a bit larger than the one in last mission I want to take 3 gas and then do the same mech composition to slowly push forward and kill the command center.
Terran Mission 06- Emporors Flight: In this mission we are introduced to a new unit the Valkyrie. They are air to air aoe fighters and really only come in handy in very few situatuations. One of these is against mutas which the mission kindly demonstratses. My objective is just to kill the command center but I go ahead and kill everything. Again my strategy is to take the 2 gas and get my factories up and running the push for the kill.
Terran Mission 07- Patriots Blood: Another Baseless mission this one just involves taking Duran through the psi disruptor and finding Stukov.
Terran Mission 08- To Chain the Beast: The last Terran Mission. In this case I decide I want a cheap but mobile force so I go for Marine Medic Science Vessel. In this mission there are 2 Cerebrates. One of them makes the red sunken colonies invulnerable until you destroy it. The other keeps regenerating a very strong ultralisk until it is killed. The path to the Red Cerebrate is protected with invulnerable sunkens so the best way to get to it is a drop. After I successfully drop and kill that cerebrate I move on to the Brown one which spawns the ultralisk. After killing that one its a straight shot to the overmind itself. Thus ends the Terran campaign.
Zerg Mission 01- Vile Disruption: Yay! They saved the best for last this time. In this mission you are reintroduced to most of the old zerg units(Not including the mutalisk) and their functions.
Zerg Mission 02- Reign of Fire: This is also a reintroduction mission designed to get you used to building a zerg base/units once more. If you can find them youre also given some hero zerg units which I use to take down the Disruptor fairly quickly.
Zerg Mission 03- The Kel-Morian Combine: This is an interesting mission in that all you have to do is collect 10,000 Minerals. This can actually be done with only 2 bases and a lot of waiting. But there's no fun in that so I decide to kill all of the terran bases. Captain Useless also tags along for this mission but he actually has his uses in this one and manages not to trip, fall, and die.
Zerg Mission 04- The Liberation of Korhal: In this mission you start out with 10000 minerals O.O ; Which is wonderful but Zerg needs gas more than it does minerals. In this mission you are up against Zerg and Terran forces, both of which use a mix of ground and flying units. I feel the best composition for this mission is just plain old upgraded hydras. They prove to be more than enough to take out the UED.
Zerg Mission 05- True Colors: In this mission we get to participate in one of my favorite activities. Cold Blooded Betrayal. We also finally get to use my favorite unit, the Lurker. I explained what they do earlier and the game shows you what they do at the beginning of the mission. We also get to choose which base we want to attack without them attacking back. Since Terran is harder for Zerg to deal with I opt to attack the Terran base and secure a key bridge with my lurkers. This also nets me 2 additional bases with gas. From here I decide to take out the protoss with a composition of Lurkers/Hydras. Using the same comp I finish off the terran base. Also we get to send Captain Useless on a well deserved vacation...permenantly.
Zerg Mission 06-Fury of the Swarm: This mission is rather annoying as in the beginning you are forced to watch all your bases die and then youre stuck on an island. That being the case I build some spores and sunkens to defend against early attacks and then move on to getting hydras and ventral sacs which will allow me to transport my hydras across the river. I opt to take the northern bases over the southern as I believe it has more minerals than the southern bases. Since I am once again facing Zerg/Terran I go for hydras again. I could have added in lurkers but in this case I didnt want to as they dont offer the mobility that hydras do. They are good for holding bridges though. After I get my 2 bases back its just a matter of time before the UED falls, again.
Zerg Mission 07-Drawing of the Web: Were back to killing protoss scum in this mission, which involves moving Duran to each beacon(there are a total of 5). We start off with an all mineral base to the north of us which I take early on. However this means we will be low on gas so I go hydras to start off. There is a base to the southwest that has a gas but it is harder to defend and is attacked often. I still take this base relatively early and fortify it with sunkens and a spore to defend against DTs. I take out the first two beacons and then expand to a 4th base. At this point I switch into ultra/lurker/ling/defiler. After this I take out the remaining beacons.
Zerg Mission 08-To Slay The Beast: This one is an interesting mission with many bases that you can take and the enemy has a sizeable force of Terran/Zerg that you must go through to get to the overmind. In this mission we get to make dark templars for the purpose of killing the overmind but since we only have a few pylons we cant make more than 8. I take the base to the left first to get a quick extra gas then I make a large amount of hydras in preparation to take the zerg base to my right. After I take this base it is dropped constantly by Zerg and Terran units. My next goal is to take the base to the northwest. This base is a fairly well fortified base in that the siege tanks can take out a large amount of units if you attack from the front. Of course since I have drop I just load up my hydras and drop ontop of the base. It falls with relative ease.
The next goal is to take the base in the northern part of the map. Once again loading up hydras and dropping proves to be effective although this base wasnt as well defended as the terran base. Next I target the base to the east of that one and once again load up for a drop. This time things don't go so well and my hydras die very quickly. I decide to drop slightly to the north and hope my better positioning will help me take out the base. Again the attack is stopped but it went a little bit better. Even though it went a little bit better it doesn't seem like this idea is going to work so instead I decide to drop in the southern portion of the map, build a hatchery, and then build a nydus so I can quickly move troops to the other side of the river. This proves to work just fine and I finish off the mission after a few waves of units.
Zerg Mission 09- The reckoning: I do this mission fairly quickly because if you finish it with at least 5 minutes left on the clock you unlock a secret mission. In this mission you only have access to one base. My plan is simple, using the same strat I used last mission I get drop and build a hatchery over on the other side of the river and funnel hydras through. Quick and clean.
Secret Mission: If you had finished the last mission with at least 5 minutes left on the clock you will unlock this mission with Zeratul. The mission itself is fairly simple. Mind control high prority targets (BCs,Tanks,Vessels) and make your way through the map slowly. After you get to the end you get a surprise visit from someone and a large plot bomb is dropped on you (If you have played through SC2 you'll see the relevance of this mission).
Zerg Mission 10- Omega: The final mission of Brood War and it is quite the doozy. Youre up against 3 forces, Mengsk (Terran, mostly ground based with heavy siege tanks.), Artanis (uses most protoss units), and Dugalle (Terran, air with ground mixed in). While it looks overwhelming its actually pretty simple. Each base can be considered a seperate mission with the added bonus of the other missions sending in units to kill you. For each base I use a different composition that has an advantage over whatever they have. For protoss I use hydras since protoss really needs to use psionic storms to take out mass hydras and the computer cant use storms effectively.
Next up comes Mengsk who has a lot of tanks. Hydras get destroyed by Tanks so I switch to ling/ultra/defiler as dark swarm lets me approach and kill the tanks. After he is wiped out its on to Dugalle and since he doesnt use a lot of tanks I simply switch back to hydras. So even though there are 3 enemies as long as you break it down its really not that hard.
Thanks for watching / reading
I wanted to note that my camera will jump around the screen occasionally seemingly without me doing anything. I am making use of the screen hotkeys done by pressing Shift+F2,3, or 4. This will save a screen location and you can recall it by pressing f2,3, or 4. Also other than the mission names there wont be any story related spoilers in this.
Terran Mission - Tutorial: This tutorial is meant to get you somewhat familiar with the controls and a few of the units and how to use them. While I am very familiar with the controls/units I feel anyone who didnt know could benefit from this. Not much else can be said that isnt already shown on screen. I did however fail pretty hard in that I didnt build 3 supply depots before the vespene geyser. I was confused as to why it wasnt advancing after I got 100 gas.
Terran Mission 01 - Wasteland : Another tutorial like mission. It gets you used to making marines and hero units (Raynor). Since there would be a lot of dead time while I build my 10 marines I decided to display vulture Micro. I attempt to show it in the video without words but what you do is movie the vulture away from the unit you want to attack and then use a patrol command (P) past the unit. The vulture will look like it fires backwards. after which you click away from the unit again and repeat the process.
Terran Mission 02 - Backwater Station: Fairly simple mission I cleared most of the map with Raynor but Raynors attack does not do so well against buildings and Hydralisks can shoot back at him so I used some marines/firebats to finish off the buildings. It should also be noted that Firebats do splash damage in a straight line in front of them.
Terran Mission 03 - Desperate Alliance: This mission involves waiting in base for 30 mins until backup comes. So in an attempt to make it more interesting I move out and clear the map
This also introduces you to weapon and armor upgrades (the infantry upgrades are at the engineering bay) each upgrade will increase your damage or armor for all units.Terran Mission 04 - The Jacobs Installation: There are a few missions like this where you are given a set of units and given an objective. There really isnt anything new to explain here that cant be seen in the video.
Terran Mission 05- Revolution: This mission involves an island map and introduces you to flying units. Most notably I use Wraith micro in this mission. Simply put if you have all the flying units in a control group fairly close together they will stack. I use this stack to hit and run on enemy units. You could also do this mission by making dropships and ferrying marines over. I just thought wraiths were more fun.
Terran Mission 06 - Norad II : I dont really do anything new here. I just make an army of Marine/Firebat and clear the map.
Terran Mission 07- The Trump Card : In this mission I finally get siege tanks. With the siege tanks I can finally go mech or Mechanical units (a combonation of vultures/goliaths/tanks). Mech is a very Gas intensive strategy so I need to secure another gas ASAP. I use missile turrets and tanks to secure the 2nd gas. From there I build more tanks and goliaths and leap frog to the objective. Going mech is the standard strategy to do in TvT (Terran vs Terran) as marines get obliterated by tanks.
Terran Mission 08- The Big Push: Since it is TvT again I use the same strategy and slowly push my way up to get a 2nd gas and build up more units then proceed to clear the map.
Terran Mission 09- New Gettysburg: In this mission you are up against protoss. Much like Terran vs Terran Mech is the standard way to play against protoss. However in this case I only have access to 1 gas and the map is very cramped. It would be hard to maneuver around the map with a mech army so I decide to just go bio (Infantry). I have trouble at the start but after the first few waves of Marine/Firebat Im able to kill the Tosss upper right base and finish his lower right after that.
Terran Mission 10 - The Hammer Falls: The last Terran mission. I decide to have some fun and go mass wraiths again ^^. Its probably not the best way to complete the mission but I enjoy air unit micro.
Zerg Mission 01 - Among the Ruins: Ah finally the best race of the 3. We are introduced to my beloved Overmind as well as the basic units. Since there isnt really much I can build other than Lings and Hydras I use those 2 to finish off the terran base.
Zerg Mission 02- Egression: This mission adds a few units but unfortunatly it is not practical to use them. Mutalisks(the flying unit) cost 100minerals/100gas your really need at least 2 gases to be able to produce them. Since I only have access to 1 gas I am forced to go hydralisks(which are much less gas intensive at 75min/25 gas). You also aquire some hero units in the form of hunter killers. These are hydralisks with increased health/armor/damage. I show the differences in the video. From here it is simply clearing a path to the beacon.
Zerg Mission 03- The New Dominion: In this mission I only start out with 1 gas, but there is another gas close by. Since the Terran has siege tanks and I dont yet have the units to properly deal with them yet this is a perfect time to go mutalisks. I only need 2 hatcheries and not very many drone to do this. The way I micro mutalisks is roughly the same as when I micro wraiths. I use an overlord instead of a trapped SCV as the unit thats far away from the rest. Mutalisks also have a shorter range than wraiths but their attack does bounce doing 9(first hit) 3 and then 1. Using hit and run micro with the mutalisks I take down missile turrets and reduce the marine count. Eventually I just run over him.
Zerg Mission 04 - Agent of the Swarm: In this mission you are isolated on an island with the objective of killing a command center. You get a glimpse of the base and there are a lot of missle turrets there. You are also limited to 1 gas at the start. There is another island with a gas on it but I didnt feel like it was worth taking. I decide instead to go for a hydralisk drop. I upgrade overlord speed and ventral sacs which lets me put units into the overlord then drop them. To load the Hydras I select them then shift click on the overlords. Shift clicking tells a unit to go to the first place you clicked and then to the second place you click. This means once an overlord is full of units they will attempt to go to the next one and so on. Now for the dropping technique I spread out the overlords so I can click on each one clearly and easily. Then I tell them to unload past where I actually want to unload them. As they are flying I select each one and press the unload button (U) and click on the overlord. This causes the overlord to begin dropping the units inside while moving toward its destination. I repeat this with as many overlords as I can before they reach their destination. I take out the terrans base and infest the command center. Normally I would be able to build Infested terrans from the command center (100min 50 gas) which run quickly and suicide for 500 damage. The mission ends right after so I dont get to.
Zerg Mission 05- The Amerigo: This is another one of those missions like The Jacobs Installation. You have to take Kerrigan through the map to the beacon. Not much of anything new here.
Zerg Mission 06- The Dark Templar: This mission gives you a new unit, guardians. They are long range air units that are upgraded from mutalisks. You can upgrade the mutalisks after you have a greater spire. In this mission I did not use them as I feel they are very slow and not as fast paced as ling/hydra is. From the starting position there are 2 bases on islands. The first thing I want to do is upgrade drop and take those 2 bases ASAP. From there I can mass up hatcheries and go ling/hydra to run the protoss over. Ling hydra is a very mineral and larvae intensive strategy so I needed to make many hatcheries to be able to keep my money low (Still had 1k+ at the end of the mission though)
Zerg Mission 07- The Culling :This is the first ZvZ (Zerg vs Zerg) mission. In this mission I know that the main zerg base is located on an island so I decide to go muta/ling. I quickly take the base to the left and then clear out another in the upper right. From there its just massing mutas and running him over.
Zerg Mission 08- Eye for an Eye: This is an interesting mission. If any dark templar touch one of the 3 beacons on the corners of the map, you fail the mission. This mission also introduces nydus worms. You can build them once you have a hive and they cost 150 minerals to place. After they are built you may select the nydus worm and it will let you build an exit anywhere else on the map where there is creep. Once finished any units right clicked on it will warp back and forth. Since Dark Templars are invisible and overlords are detectors you must also have 1 overlord by each beacon to see the Templars. Your objective is to kill the 2 protoss bases. My objective is to go Ling/Ultralisk/Defiler (Defilers for darkswarm). Dark Swarm prevents any ranged damage from hitting any unit inside the swarm. The applies for my units and enemy units. However splash damage will still affect units. A Reaver shot will work, the Archons main hit will not work but the splash damage will, and the main hit from a tank will not work but the splash damage from it will as well. I demonstrate its use in the video. To get that composition however I need at least 3 gas so I take the two bases near the other two nydus canals. After Ive built up enough I move in for the kill.
Zerg Mission-09-The invasion of Aiur: This mission involves getting a drone to a beacon in the lower center of the map and then holding it for awhile. I know that I am limited to about 2 gas so I decide to just make hydralisks. Hydras are the bane of all protoss. The only way to take care of them is to use AoE(Reavers or Psionic Storm). psionic storm is the better of the 2 options but the AI never has enough templar and isnt able to place them correctly to prevent me from dodging them. it is a fairly straight forward mission, make hydras, kill things.
Zerg Mission 10 - Full Circle: This is the final mission for zerg. If you are not aware of the meaning of "Zerging" something my play in this mission should make it clearer. The beginning starts normally I kill off a creep colony so I may place my hatchery. From here I am looking to expand and since I know I have 3 or more gases available to me my intention is to go Zergling Ultra defiler. Since i only have one gas I start off with hydras with the intention of taking the bases to my left and right. My attack on the left base went well, so I thought. I was a little too greedy and tried to make too many drones before actually securing the bottom left base. I end up losing control of that base and make more hydras and send them over in an attempt to secure it. Then 3 scouts and a carrier. Out of nowhere they came from the right side and I had nnothing to defend with as I had used all my hydras on the left base. I was in a lot of trouble but I separated the scouts from the carriers and killed them off. From there I built more hydras and killed the carrier and regain control. My plan remains the same but I carry it out a little more carefully this time. After taking the left base I add on more hatcheries and then go for the right side. At this time I realized that although I had 3 gases the gas to mineral ratio was not so great. I decided to continue the Ling/Ultra/Defiler plan, but without the Ultras and Defilers. I then proceed to zerg the protoss temple. The weak and feeble protoss stood no chance against the might of the swarm.
Protoss Mission 01-First Strike: Unfortunatly all good things must come to an end and starcraft saved the worst for last. Its time to begin the protoss campaign. Since the protoss are so weak I wasnt sure I would actually be able to finish this campaign but I figured with my superior zerg intellegence I would be able to pull these inferior warriors through. Much like the last 2 campaigns this one starts out with a basic tutorial on how the workers and the buildings work for protoss. I upgrade +1 weapons for my zealots which is very important vs zerg. If a zergling has 0 armor and a zealot has +1 weapon the zergling will die in 2 attack animations from the zealot. If they have even upgrades it will take 3 hits from the zealot. Had I not been controlling them the protoss would never have been smart enough to figure this out and would have fallen to the swarm.
ALSO fun fact: If Judicator Aldaris sounds a little familiar that is Paul Eiding AKA the Colonel from Metal Gear Solid.
Protoss Mission 02-Into the Flames: Also a pretty simple mission. I start out fine just making units and attacking the glorious zerg base. Then Fenix comes in and since he has no idea what to do on his own I have to tell him where the cerebrate is and to attack it. Things are going well until finally Fenixs frail and useless body falls to STATIONARY defense structure. Congratulations Fenix you died to a unit that doesnt even move. Thats like running into a parked car on foot and dieing, good job. Even though I think the outcome was wonderful the game does not agree with me. I have to do it again but this time I know better. Since Fenix is completely useless I decide that this time Ill leave him up on the high ground. But since hes also an idiot and might run off and trip over a rock and die I decide to block the ramp as well just to make sure. Fortunately Fenix did not jump off the cliff and die so I was able to compete this mission.
Protoss Mission 03-Higher Ground: The foolish protoss have finally realized that they cannot hope to harm the zerg. But since there dumb as bricks they are going to try anyways. This mission was a little bit of a fail. I wanted to go mass scouts and micro them much like wraiths and mutas. However you should know scouts are the worst units in the game. They cost 275 minerals and 125 gas and 3 supply and do almost nothing to ground units. Their only Strength is that they can be microd like wraiths and Mutalisks. After the first few attack attempts on the zerg base it becomes apparent that they are actually so bad that I'm not going to be able to make it work. So instead I make an army of zealot/dragoon and clear the map. Fortunately the Cerebrates were playing poker in the zerg briefing room otherwise I would have died.
Protoss Mission 04- The Hunt for Tassadar :Well lookie here captain useless gets himself killed by ONE hydralisk. Just ONE. Good job. At any rate since we beat the two AFK cerebrates we get told by the Colonel to go find Tassadar, who might be the only USEFUL protoss out of the whole bunch. You start out with a few units and must get through a gauntlet of clever zerg units. Fortunately we completely outnumber them otherwise we would have died. After we find Tassadar I get a nice idea. I think to myself "I bet I can do this with just Raynor& Then I run into hydralisks & Okay I bet I can do it with only Raynor and Tassadar" Then I run out of storms, "Okay I bet I can do this with only Raynor Tassadar and 2 Templar for storms and them merge them for 1 archon"...then I run into more zerg. "Okay I bet I can do this with just Raynor Tassadar an Archon and some dragoons" Then the dragoons die. okay I bet I can do this with ju-ah screw it" Eventually I get through though.
Protoss Mission 05-Choosing Sides: The Colonel is not pleased. Sadly we dont get the option to side with him which I might have done since he is The Colonel after all. Getting on to the actual mission though it is a bit lame. You have to maneuver a shuttle through Zerg airspace to get to the beacon. Instead of killing everything I decide to make a lot of shuttles and a few templar then make a bunch of hallucinated shuttles and pray that Tassadars shuttle does not die. Fortunatly it doesn't and this one is over fairly quick.
Protoss Mission 06- Into The Darkness
ear god I still remember this one from my childhood. Specifically because I died so many times on it. Killing the units isn't so tough it's the burrowed infested Terrans that are the problem. The way you deal with them is to hallucinate a zealot and run it in to an infested Terran. It will blow up killing itself and your hallucination. But you really need to know where they are located otherwise they will surprise you. Fortunatly I remembered that the burrowed ones are only set off by marines so I was able to bait them out. If you actually know where most of them are the mission isnt too difficult.Protoss Mission 07- Homeland :Great, Captain Failboat is back, just who I wanted to see. Now Colonel is REALLY REALLY upset with us so its time to take him on. This mission I expand quickly and build up an army big enough to take out the bottom left base. From there I pushed onward toward the bottom right. I used Zealot/Dragoon/Templar for this one. You should have either high templar or reavers with your army as you always want at least some AoE.
Protoss Mission 08- The Trial of Tassadar :This mission kinda sucks. Because of the way the map is shaped its hard to assault the base from the ground which leaves the air. Which means carriers So I built up a ground army and took both of the bases on my side of the river and got a control group of carriers. A little micro later and the mission was done.
Protoss Mission 09-Shadow Hunters: In this mission you must kill two cerebrates with Zeratul. Now that the Zealot/Archon composition is open to me, AND I start with 2 gas I gladly take the opportunity to use this comp. After finishing upgrades it wasnt too hard to defeat the Cerebrates (Probably playing poker again).
Protoss Mission 10 - Eye of the Storm: In this mission you get to control both Protoss and Terran units. Again I did a bit of a fail in trying to use bio against the zerg. The AI has burrowed Defilers which cast plague on your units when they get too close. After a few waves of Bio I realized this wasnt going to work and that I would need to go zealot archon. I did however have some vessels which would be useful with archons. I also managed to find 4 gas geysers in the top right which enabled me to make almost all archons. I finish the mission off with D-Matrix(Absorbs 250 damage) on Archons.
While the ending isnt exactly to my liking it doesn't bother me too much. The Swarm Never Dies.
Thank you for reading/watching or just watching.
-------------------------------------------------------------------------------
Hey, its JadedZerg again and this time Ill be doing Starcraft Broodwar. This is the expansion to the origional Starcraft and I hope you enjoy this playthrough. Much like last time Ill be explaining anything new as well as my thought process (If I have one). Let jump in.
Protoss Mission 01- Escape From Aiur: Well they decided to have you play the worst race first which is fine with me. The sooner it is out of the way the better
. This mission inolves you taking Zeratul along with a small squad of units and navigating your way through a map to reach a warpgate to escape. Unlike the SC1 intro missions the BW intro missions assume you know what youre doing and throw you right into the action. After the first few sections you get to a point where you are given a large amount of zealots that are already fighting zerg. Here I select portions of the group move it back a little and tell it to re-engage. Im trying to give myself a slightly wider arc so that more zealots will fit into it and give me a better exchange. Near the midpoint you are given an archon, 2 templars, zealots, and dragoons. I immediately make the two templars turn into an archon because templars are way to slow and there really arent enough zerg units left on the map to justify using storms. I continue on and reach the warpgate. A little vulture micro rounds out this mission.Protoss Mission 02- Dunes of Shakuras: Another intro mission that contains "new" units. I say "new" because weve seen dark templar before. However, in this game you can now make them for 125minerals/125gas. Sadly we dont start out with a nexus so theres a little dead time while I build one and 2 pylons. Feel free to skip to 17:05. At this point we are given 4 dark templar. While I am making probes and getting some gateways up I grab these 4 DTs. There are some Sunken Colonies around the map that I am going to kill. Since DTs are invisible they cannot be seen unless an overlord is nearby. Once an invisible unit attacks a building the AI is programmed to send an overlord to that location. so I surround a sunken kill it then back off. After the overlord leaves I am free to return. There is another base I could take in the lower left but there isnt really a need to, the base you start with is more than enough to get the units needed to destroy the zerg base. From here I wait for zealot speed upgrade and proceed to destroy the zerg base.
Protoss Mission 03 - Legacy of the XelNaga: Then it is clear that we must retireve these crystals where ever they may be-Artanis. From henceforth Artanis will be known as Praetor Noh'Sheet. At any rate this mission mainly serves to introduce you to an actual new unit the Corsair. They are an air to air fighter and while they dont do a lot of damage on their own their attacks do splash damage to units nearby. This makes them ideal for taking on a flock of mutalisks. Their other ability, which is displayed at the beginning, is Disruption web. It is cast on the ground and anything inside the circle may not attack at all, including Melee Units. The AI shows us that it is effective at disabling Spores and Sunkens. This is important as your objective is to get on an island base and take out 2 cerebrates (Probably STILL playing poker) located on an island. You do not have to use disruption web to get onto the island but it helps. Sadly, most of this mission is me building/upgrading an army to drop onto his main base. After I take the other base I simply get enough shuttles and drop zealot/archon onto the island.
Protoss Mission 04 - The Quest for Uraj: Thanks to Praetor Nohs brilliance we now all know what we have to do. This mission begins with you taking out a terran base. After this is done I establish my own. In this mission there are two ways you can go about reaching the objective. The first way is to use the path directly to the south. This is a frontal attack route. There is another route that starts at the back of your base. I opt for the 2nd route as it is much quicker but it does involve using shuttles.
Protoss Mission 05- The Battle of Braxis: This is another Mission in which your objective is to kill all the generators. After you kill each generator you are given more units. At the first one I get my dragoons up on the high ground to attack the bunkers. Units on the lowground have a 47% chance to miss their attacks on units on the high ground so after the units in the bunker are attacking the dragoons I move the zealots in for the kill. The second generator is more annoying since trying to move dragoons around in small passageways is very frustrating. At the end though I get everything positioned correctly and bumrush it. The path to the next generator is protected by siege tanks so I use scouts to take them out then send my ground forces in to get rid of the generator. The next sections generator is on a fortified island which is surrounded by 4 ghosts and spider mines using the dragoons and observer I clear out the spider mines and use my templars to storm on top of the ghosts. I manage to get lucky and a tank comes to the edge to check out whats going on so I get a free kill. After I take the 2 missile turrets down I decide I can drop DTs and take out the generator. The last generator takes a little while to setup but once I do, it ends gloriously.
Protoss Mission 06-Return to Char: As stated in the briefing, there are two ways to complete this mission. However, since I am limited to 2 gas but have a buttload of minerals I decide to go Zealot/Archon and overrun the overmind. The protoss base is also slightly closer to the overmind so less walking that way. We also get our first glimpse of lurkers(the things at the top of the ramp). They are zerg units that may only attack while burrowed and send spikes up towards their target. Each spike also does splash damage where it comes up from the ground. After breaking through the first base I Zealot/Archon my way to the overmind and incapacitate him.
Protoss Mission 07- The Insurgent: We return home to find that The Colonels jimmies have been rustled a bit too hard and now we have to deal with him. When we get into the mission we see that there are 3 Colonels. 2 are fake 1 is real. There are a few ways to do this mission. The easiest way to do it is to turtle till you have 12 carriers and then run him over. Instead I decide to go for a large ground army with Dark Archons to mind control anything important. I take 2 expansions early on and rely on my Dark Templar/Archon to defend it. I get surprised a little early on and almost lose my 3rd expansion because of it. After I defend that attack and get my gates up and producing, I begin the assault. Sadly, this mission does not have a happy ending. I would have much rather disposed of Praetor Noh instead.
Protoss Mission 08- Countdown: The last protoss mission, and it comes in two parts. The first part is getting Zeratul and Noh to the temple and the second part is defending that temple from the zerg for 15 mins. My plan is to get upgrades and a decent sized army. Then to go and take the middle of the map but not bring Zeratul/Noh. Ill then establish a base around the temple and use Zealot/Cannon/Corsair to defend. Zealots will take care of anything on the ground (AI doesn't use lurkers in large enough numbers to stop my zealots) Corsairs will take care of everything in the air, and the cannons will stall until my Zealots or Corsairs can get there. Everything pretty much goes according to plan so after a lot of building up/waiting/defending the protoss campaign is complete.
Terran Mission 01- First Strike: In this first terran mission we start off with no gas at our first base and only 1 other gas on the map. With access to only 1 gas I decide the best thing to do in this case is build up a force of marine/tank and push into the command center. Its also a bit easier to maneuver marine/tank through the path in the back than vulture/tank.
Terran Mission 02- The Dylarian Shipyards: This is a baseless mission and mostly serves to introduce you to one of your new units, the medic. Unfortunately the abilities you learn to use with the medic dont really apply in practical situations and are only useful rarely. While I use blind to render the tanks useless if there was even one other enemy unit nearby it could for the tank and the tank would still be able to fire. The Restoration spell is alright but youll rarely use it since its only good to use on high priority targets(Tanks/Vessels). The example they give us is removing lockdown. But in TvT I'd rather have 1 more tank than a medic and restoration. Throughout this mission youll see me selecting all 5 pilots clicking on one beacon then deselecting one pilot and clicking on another beacon and so on until theyve all been given orders. This is a process known as (Clone - ing) and I use it in a more practical situation in the last part of the mission. Once I've gotten all my battle cruisers I leave a few out in front to spot. Once the enemies cruisers come into view I select all my battle cruisers and tell them to use Yamoto Cannon on one of the enemy cruisers. Then I deselect 2 of them and tell the rest to use Yamoto on a different cruiser. If I had just let the 12 battlecruisers use Yamoto cannon on one battle cruiser they would have all fired and I would have wasted a lot of damage. This way I spread the damage out and give myself a large advantage in the fight.
Terran Mission 03- Ruins of Tarsonis: In this mission I use the standard Marine Medic to kill everything on the map. It also includes the use of dropships to finish off the last zerg base.
Terran Mission 04- Assault on Korhal: In this mission we are given a choice. Either take out the physics labs or the nuclear silos. As the briefing states whichever one you take out will result in the enemy not being able to use either battle cruisers or nukes in the next mission. As much as I enjoy a good game of "Find-The-Little-Red-Dot-in-5-seconds-or-lose-everything" I decide Id rather deal with battlecruisers next mission. The strategy is simple for this one, I want to secure 2 gas and then get a mix of tanks/goliaths and push into the silos. There is another base you can take to the south west but you really only need 2 gas for this. If you do love to play "FTLRDI5SOLE" you may do the same thing but instead destroy the labs to the north east.
Terran Mission 05- The Hammer Falls(Birds of War): As stated in the previous mission had you decided to go for the labs you would be facing nukes instead. As such in the beginning your 3 outposts would have been destroyed by nukes instead of battle cruisers. Since this base is a bit larger than the one in last mission I want to take 3 gas and then do the same mech composition to slowly push forward and kill the command center.
Terran Mission 06- Emporors Flight: In this mission we are introduced to a new unit the Valkyrie. They are air to air aoe fighters and really only come in handy in very few situatuations. One of these is against mutas which the mission kindly demonstratses. My objective is just to kill the command center but I go ahead and kill everything. Again my strategy is to take the 2 gas and get my factories up and running the push for the kill.
Terran Mission 07- Patriots Blood: Another Baseless mission this one just involves taking Duran through the psi disruptor and finding Stukov.
Terran Mission 08- To Chain the Beast: The last Terran Mission. In this case I decide I want a cheap but mobile force so I go for Marine Medic Science Vessel. In this mission there are 2 Cerebrates. One of them makes the red sunken colonies invulnerable until you destroy it. The other keeps regenerating a very strong ultralisk until it is killed. The path to the Red Cerebrate is protected with invulnerable sunkens so the best way to get to it is a drop. After I successfully drop and kill that cerebrate I move on to the Brown one which spawns the ultralisk. After killing that one its a straight shot to the overmind itself. Thus ends the Terran campaign.
Zerg Mission 01- Vile Disruption: Yay! They saved the best for last this time. In this mission you are reintroduced to most of the old zerg units(Not including the mutalisk) and their functions.
Zerg Mission 02- Reign of Fire: This is also a reintroduction mission designed to get you used to building a zerg base/units once more. If you can find them youre also given some hero zerg units which I use to take down the Disruptor fairly quickly.
Zerg Mission 03- The Kel-Morian Combine: This is an interesting mission in that all you have to do is collect 10,000 Minerals. This can actually be done with only 2 bases and a lot of waiting. But there's no fun in that so I decide to kill all of the terran bases. Captain Useless also tags along for this mission but he actually has his uses in this one and manages not to trip, fall, and die.
Zerg Mission 04- The Liberation of Korhal: In this mission you start out with 10000 minerals O.O ; Which is wonderful but Zerg needs gas more than it does minerals. In this mission you are up against Zerg and Terran forces, both of which use a mix of ground and flying units. I feel the best composition for this mission is just plain old upgraded hydras. They prove to be more than enough to take out the UED.
Zerg Mission 05- True Colors: In this mission we get to participate in one of my favorite activities. Cold Blooded Betrayal. We also finally get to use my favorite unit, the Lurker. I explained what they do earlier and the game shows you what they do at the beginning of the mission. We also get to choose which base we want to attack without them attacking back. Since Terran is harder for Zerg to deal with I opt to attack the Terran base and secure a key bridge with my lurkers. This also nets me 2 additional bases with gas. From here I decide to take out the protoss with a composition of Lurkers/Hydras. Using the same comp I finish off the terran base. Also we get to send Captain Useless on a well deserved vacation...permenantly.
Zerg Mission 06-Fury of the Swarm: This mission is rather annoying as in the beginning you are forced to watch all your bases die and then youre stuck on an island. That being the case I build some spores and sunkens to defend against early attacks and then move on to getting hydras and ventral sacs which will allow me to transport my hydras across the river. I opt to take the northern bases over the southern as I believe it has more minerals than the southern bases. Since I am once again facing Zerg/Terran I go for hydras again. I could have added in lurkers but in this case I didnt want to as they dont offer the mobility that hydras do. They are good for holding bridges though. After I get my 2 bases back its just a matter of time before the UED falls, again.
Zerg Mission 07-Drawing of the Web: Were back to killing protoss scum in this mission, which involves moving Duran to each beacon(there are a total of 5). We start off with an all mineral base to the north of us which I take early on. However this means we will be low on gas so I go hydras to start off. There is a base to the southwest that has a gas but it is harder to defend and is attacked often. I still take this base relatively early and fortify it with sunkens and a spore to defend against DTs. I take out the first two beacons and then expand to a 4th base. At this point I switch into ultra/lurker/ling/defiler. After this I take out the remaining beacons.
Zerg Mission 08-To Slay The Beast: This one is an interesting mission with many bases that you can take and the enemy has a sizeable force of Terran/Zerg that you must go through to get to the overmind. In this mission we get to make dark templars for the purpose of killing the overmind but since we only have a few pylons we cant make more than 8. I take the base to the left first to get a quick extra gas then I make a large amount of hydras in preparation to take the zerg base to my right. After I take this base it is dropped constantly by Zerg and Terran units. My next goal is to take the base to the northwest. This base is a fairly well fortified base in that the siege tanks can take out a large amount of units if you attack from the front. Of course since I have drop I just load up my hydras and drop ontop of the base. It falls with relative ease.
The next goal is to take the base in the northern part of the map. Once again loading up hydras and dropping proves to be effective although this base wasnt as well defended as the terran base. Next I target the base to the east of that one and once again load up for a drop. This time things don't go so well and my hydras die very quickly. I decide to drop slightly to the north and hope my better positioning will help me take out the base. Again the attack is stopped but it went a little bit better. Even though it went a little bit better it doesn't seem like this idea is going to work so instead I decide to drop in the southern portion of the map, build a hatchery, and then build a nydus so I can quickly move troops to the other side of the river. This proves to work just fine and I finish off the mission after a few waves of units.
Zerg Mission 09- The reckoning: I do this mission fairly quickly because if you finish it with at least 5 minutes left on the clock you unlock a secret mission. In this mission you only have access to one base. My plan is simple, using the same strat I used last mission I get drop and build a hatchery over on the other side of the river and funnel hydras through. Quick and clean.
Secret Mission: If you had finished the last mission with at least 5 minutes left on the clock you will unlock this mission with Zeratul. The mission itself is fairly simple. Mind control high prority targets (BCs,Tanks,Vessels) and make your way through the map slowly. After you get to the end you get a surprise visit from someone and a large plot bomb is dropped on you (If you have played through SC2 you'll see the relevance of this mission).
Zerg Mission 10- Omega: The final mission of Brood War and it is quite the doozy. Youre up against 3 forces, Mengsk (Terran, mostly ground based with heavy siege tanks.), Artanis (uses most protoss units), and Dugalle (Terran, air with ground mixed in). While it looks overwhelming its actually pretty simple. Each base can be considered a seperate mission with the added bonus of the other missions sending in units to kill you. For each base I use a different composition that has an advantage over whatever they have. For protoss I use hydras since protoss really needs to use psionic storms to take out mass hydras and the computer cant use storms effectively.
Next up comes Mengsk who has a lot of tanks. Hydras get destroyed by Tanks so I switch to ling/ultra/defiler as dark swarm lets me approach and kill the tanks. After he is wiped out its on to Dugalle and since he doesnt use a lot of tanks I simply switch back to hydras. So even though there are 3 enemies as long as you break it down its really not that hard.
Thanks for watching / reading
3 comments
-
 S_SoulReaver- January 03 2014 00:49:46
 -
maysjw- January 20 2014 17:33:27
-
 Frederikct112- January 20 2014 19:58:52
/