


 We are still waiting on a suitable Amiga AGA emulator with robust recording features before tackling such games.
Chip's Challenge
| 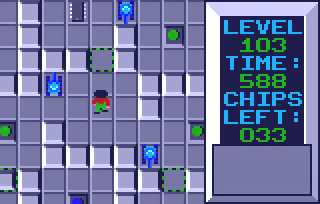
Screenshot |


Player's Review
Chip's Challenge gained fame mainly from the Windows port produced by Microsoft. This, however, was the original version. It is tile-based game with both puzzle and reflex elements. In this movie, I first play through the 144 levels of the main game. I then enter level code JHEN to access the 4 secret levels, numbered 146-149. (There is no level 145.) After completing the secret levels, I enter code MAND to access the Mandelbrot and Julia set plotter. (Nothing in the game itself tells you this code exists. You just have to know about it somehow.) After messing around with the plotter for a while, I end the movie.
The slightest mistake can lead to death or an unwinnable situation, requiring you to restart the level. Fortunately, Bizhawk has a rewind key, which I used to undo such mistakes, and even things that I thought looked bad or sloppy. I didn't have any consistent practice about such things, however.
In some levels there are things hidden under blocks, including harmful things. A few times I deliberately fall for these to show that they are there. There is a technique, called "block slapping" in the Chip's Challenge community, to push a block without stepping onto the vacated tile. This can be used to safely see what is under a block. It seems unlikely that the game designers intended the ability to block slap, and this movie never shows it.
Here are some notes on specific levels:
00:20:37 020 (TOSSED SALAD): There is no chip socket, so you don't need to collect any chips. I do show collecting them all anyway.
00:57:29 034 (CYPHER): This level's layout contains three different level codes. The last of them leads to the secret levels.
01:16:20 045 (MONSTER LA : The idea here is to keep a toggle wall permanently closed, to keep the path to the exit clear of monsters. To do this, we block off all the clone machines, which are producing monsters that push the green buttons and keep toggling the doors. (Incidentally, you can use block slapping to skip essentially everything.)
01:24:00 051 (I SLIDE): Ice mazes like this can really mess with spatial intuition. Here I follow the method of always turning right (unless there's an obvious dead end). This works well to systematically explore an area, provided there are no loops. One of the networks has two different access points from the main hub, but that's not a huge problem. And of course, it works just as well to always turn left.
01:27:47 052 (THE LAST LAUGH): There's a stream of fireballs being cloned, preventing you from going to the upper portion of the level. When you cross from the left to the right, or vice versa, the teeth monster pushes the green button, switching the stream over to your side. The solution is to make the teeth monster push the button and then step back, so now the fireballs block the side other than the one you are on.
01:28:32 053 (TRAFFIC COP): I use the solution suggested in the hint, but it's actually quite simple to fill in some water and just push the button yourself.
01:32:19 055 (POTPOURRI): The block immediately up from the starting point has fire under it. A couple other blocks have thieves under them that can take your fire shield.
01:40:08 059 (HIDDEN DANGER): There's another solution that doesn't require getting any chips. A teleport is in the right area of the level, and going down through it leads directly to the exit.
01:44:10 061 (RINK): Here I again follow the "turn right" method, with an ad hoc rule to deal with a large loop present.
01:51:47 063 (BLOCK FACTORY): I take a brief detour to show the letters PW (the initials of the level designer, Pete Wierzbicki).
02:41:20 084 (WARS): You are apparently meant to direct the fireballs into the circling bugs. This results in a chaotic and risky situation. As the movie shows, there's an easier way of solving the level.
02:41:49 085 (TELENET): When going through the teleports, there is a danger of colliding with a fireball. In each room there is a safe teleport direction that will not put you on the fireball's path. Rather then memorize all these, or just going through and taking the risk, you can exploit the consistent positioning of fireballs in the different rooms. If you go down through the teleport when the fireball in the current room is to the left, all the fireballs will be to the left of the teleports in their respective rooms, so you will be safe.
02:56:06 089 (BLOCK BUSTER): The second block-dodging gauntlet is perhaps the most frustrating thing in the game. I do not mind saying I made a savestate both before and after it.
03:10:56 095 (FOUR SQUARE): This level has 8 chips, of which only 2 are required. There is a fair variety of possible solutions. I show a simple one that does not require venturing into the areas with monsters.
03:36:28 111 (TIME LAPSE): If you dally too much the toggle walls will close and trap you. But you pretty much have to just wait around doing nothing for this to happen.
03:48:24 119 (SLIDE STEP): By opening and closing the toggle walls, I confine the ball to a particular area, allowing to slide on the ice without risk of collision. This is not strictly necessary, but is safer.
03:50:13 120 (ALPHABET SOUP): One of the blocks in the "d" room has a bomb under it.
03:51:50 121 (PERFECT MATCH): I tried to show as best I could how this level works. You need to keep the toggle wall permanently closed. There are two tracks with fireballs on them, which press green toggle buttons. You have to arrange it so the fireballs on both tracks are perfectly in sync. Thus, toggle button presses occur in pairs, canceling each other out.
04:01:58 126 (BLOCK N ROLL): All the blocks in the lower-right area that I don't push have fire under them. It's not hard to know which ones they are once you realize they're in a checkerboard pattern.
04:07:37 128 (ALL FULL): To stop monsters from pressing the clone buttons, you have to clog the region with monsters. If the monsters can't move, they can't push any buttons. This is done twice, one near the beginning, with bouncing balls, and once later with fireballs.
04:13:17 131 (TOTALLY UNFAIR): The clue references level 122, TOTALLY FAIR. In that level you had to lure a teeth monster onto the brown button. This level has almost the same layout, but prevents you from entering the area where the teeth monster and button are. So you have to accomplish the same thing without the benefit of seeing what is happening.
04:47:21 136 (DOUBLEMAZE): It can be very easy to get lost here, but fortunately there are no loops. I follow the "turn right" method, then switch to "turn left" at one point, while remembering a few places to take detours, ensuring that when I reach the chip socket I have all the chips. This worked better than I expected, as I only got lost once (which you can't see, since I rewound that part).
05:06:18 143 (STRIPES?): Savestates were used to get through this without tons of being lost, or having to memorize a lot of layout.
05:21:20 147 (FORCE FIELD): Again, savestates were used a lot. The result has kind of an artificial perfection to it, but is probably more pleasant to watch.
05:29:51 149 (SPECIAL): There are two more places (in the upper-right and lower-right corners) with the "This spot would be too obvious!" message. Also, lots of the blocks have fire under them.
The slightest mistake can lead to death or an unwinnable situation, requiring you to restart the level. Fortunately, Bizhawk has a rewind key, which I used to undo such mistakes, and even things that I thought looked bad or sloppy. I didn't have any consistent practice about such things, however.
In some levels there are things hidden under blocks, including harmful things. A few times I deliberately fall for these to show that they are there. There is a technique, called "block slapping" in the Chip's Challenge community, to push a block without stepping onto the vacated tile. This can be used to safely see what is under a block. It seems unlikely that the game designers intended the ability to block slap, and this movie never shows it.
Here are some notes on specific levels:
00:20:37 020 (TOSSED SALAD): There is no chip socket, so you don't need to collect any chips. I do show collecting them all anyway.
00:57:29 034 (CYPHER): This level's layout contains three different level codes. The last of them leads to the secret levels.
01:16:20 045 (MONSTER LA
: The idea here is to keep a toggle wall permanently closed, to keep the path to the exit clear of monsters. To do this, we block off all the clone machines, which are producing monsters that push the green buttons and keep toggling the doors. (Incidentally, you can use block slapping to skip essentially everything.)01:24:00 051 (I SLIDE): Ice mazes like this can really mess with spatial intuition. Here I follow the method of always turning right (unless there's an obvious dead end). This works well to systematically explore an area, provided there are no loops. One of the networks has two different access points from the main hub, but that's not a huge problem. And of course, it works just as well to always turn left.
01:27:47 052 (THE LAST LAUGH): There's a stream of fireballs being cloned, preventing you from going to the upper portion of the level. When you cross from the left to the right, or vice versa, the teeth monster pushes the green button, switching the stream over to your side. The solution is to make the teeth monster push the button and then step back, so now the fireballs block the side other than the one you are on.
01:28:32 053 (TRAFFIC COP): I use the solution suggested in the hint, but it's actually quite simple to fill in some water and just push the button yourself.
01:32:19 055 (POTPOURRI): The block immediately up from the starting point has fire under it. A couple other blocks have thieves under them that can take your fire shield.
01:40:08 059 (HIDDEN DANGER): There's another solution that doesn't require getting any chips. A teleport is in the right area of the level, and going down through it leads directly to the exit.
01:44:10 061 (RINK): Here I again follow the "turn right" method, with an ad hoc rule to deal with a large loop present.
01:51:47 063 (BLOCK FACTORY): I take a brief detour to show the letters PW (the initials of the level designer, Pete Wierzbicki).
02:41:20 084 (WARS): You are apparently meant to direct the fireballs into the circling bugs. This results in a chaotic and risky situation. As the movie shows, there's an easier way of solving the level.
02:41:49 085 (TELENET): When going through the teleports, there is a danger of colliding with a fireball. In each room there is a safe teleport direction that will not put you on the fireball's path. Rather then memorize all these, or just going through and taking the risk, you can exploit the consistent positioning of fireballs in the different rooms. If you go down through the teleport when the fireball in the current room is to the left, all the fireballs will be to the left of the teleports in their respective rooms, so you will be safe.
02:56:06 089 (BLOCK BUSTER): The second block-dodging gauntlet is perhaps the most frustrating thing in the game. I do not mind saying I made a savestate both before and after it.
03:10:56 095 (FOUR SQUARE): This level has 8 chips, of which only 2 are required. There is a fair variety of possible solutions. I show a simple one that does not require venturing into the areas with monsters.
03:36:28 111 (TIME LAPSE): If you dally too much the toggle walls will close and trap you. But you pretty much have to just wait around doing nothing for this to happen.
03:48:24 119 (SLIDE STEP): By opening and closing the toggle walls, I confine the ball to a particular area, allowing to slide on the ice without risk of collision. This is not strictly necessary, but is safer.
03:50:13 120 (ALPHABET SOUP): One of the blocks in the "d" room has a bomb under it.
03:51:50 121 (PERFECT MATCH): I tried to show as best I could how this level works. You need to keep the toggle wall permanently closed. There are two tracks with fireballs on them, which press green toggle buttons. You have to arrange it so the fireballs on both tracks are perfectly in sync. Thus, toggle button presses occur in pairs, canceling each other out.
04:01:58 126 (BLOCK N ROLL): All the blocks in the lower-right area that I don't push have fire under them. It's not hard to know which ones they are once you realize they're in a checkerboard pattern.
04:07:37 128 (ALL FULL): To stop monsters from pressing the clone buttons, you have to clog the region with monsters. If the monsters can't move, they can't push any buttons. This is done twice, one near the beginning, with bouncing balls, and once later with fireballs.
04:13:17 131 (TOTALLY UNFAIR): The clue references level 122, TOTALLY FAIR. In that level you had to lure a teeth monster onto the brown button. This level has almost the same layout, but prevents you from entering the area where the teeth monster and button are. So you have to accomplish the same thing without the benefit of seeing what is happening.
04:47:21 136 (DOUBLEMAZE): It can be very easy to get lost here, but fortunately there are no loops. I follow the "turn right" method, then switch to "turn left" at one point, while remembering a few places to take detours, ensuring that when I reach the chip socket I have all the chips. This worked better than I expected, as I only got lost once (which you can't see, since I rewound that part).
05:06:18 143 (STRIPES?): Savestates were used to get through this without tons of being lost, or having to memorize a lot of layout.
05:21:20 147 (FORCE FIELD): Again, savestates were used a lot. The result has kind of an artificial perfection to it, but is probably more pleasant to watch.
05:29:51 149 (SPECIAL): There are two more places (in the upper-right and lower-right corners) with the "This spot would be too obvious!" message. Also, lots of the blocks have fire under them.
No Comments have been Posted.